Home inspection complete: What’s next for buyers?
Contributed by Karen Idelson
Oct 27, 2025
•11-minute read
If you’re a home buyer who just had a property you want to buy evaluated by a professional inspector, you might wonder how to handle the results and what they mean for your negotiations with the seller.
It’s important to carefully review the results and make sure you understand what repairs are recommended by the inspector, decide how the repairs will be done, and decide who will pay for them. You should also be aware of your rights as a buyer and when to exercise them. We’ll take you through this process step by step so you can decide what’s right for you in your unique position.
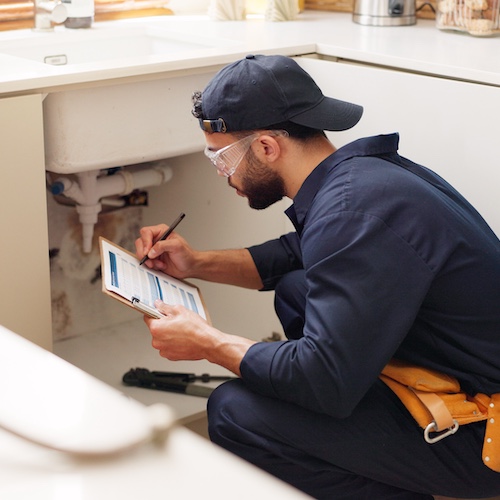
Why is the home inspection important?
A professional home inspection is an essential tool for buyers who want to know about potential issues the property may have and what repairs may be needed. The home inspection is a non-invasive evaluation of the home’s physical structures and systems. The evaluation should cover items commonly found on a home inspection checklist.
“No one enjoys unexpected expenses with their new home. A thorough home inspection can significantly reduce unforeseen costs,” says Bud Rozell, an ASHI Certified Inspector with Good Home Inspection. “A solid home inspection report can also be a powerful negotiation tool during the option period.”
Once you have the results, you can use the home inspection report to determine whether and how to negotiate with the seller. Since you may be uncertain what a professional home inspector will find during the inspection process, it’s generally advisable not to waive your home inspection contingency in case the issues with the home are costly and complex.
“The inspection is crucial because it reveals problems that buyers might not notice on their own, such as electrical issues or roof damage. And the inspection report provided by the professional inspector offers a schedule for upcoming homeowner upkeep,” says Dennis Shirshikov, a professor of finance and economics at City University of New York/Queens College.
See what you qualify for
Who’s responsible for covering repairs?
Responsibility for fixing problems noticed by the inspector is negotiable. You, the buyer, have the option to request a price reduction, ask for repair credits, or request that the seller handle certain repairs. In some cases, both the buyer and seller can agree to split repair costs. You can work with your real estate agent to come up with reasonable requests after the home inspection.
The seller may be responsible for fixing structural, health, and safety hazards, such as mold or building code violations, based on state laws or certain mortgage program requirements. You can work with your real estate agent and lender to get a better understanding of what’s required.
“Many lenders, such as FHA lenders, will require that certain repairs be made to ensure the collateral for the loan is sufficient,” says Mike Otranto, a real estate investor and personal finance expert.
If the seller has listed the house to be sold “as-is,” keep in mind that means they are listing it in the home’s current condition. What this means can vary from the house having cosmetic issues to more expensive problems. You may still request repairs or fixes, but you should be prepared for the seller to say no. Also, keep in mind that a seller’s market can make the seller less amenable to requests because there are many willing buyers.
Take the first step toward the right mortgage
Apply online for expert recommendations with real interest rates and payments
7 steps to take after a completed home inspection
Once a professional inspection is completed, you’ll want to follow several to-dos to ensure that any problems noted in the report are properly addressed. Let’s explore each of these steps in order.
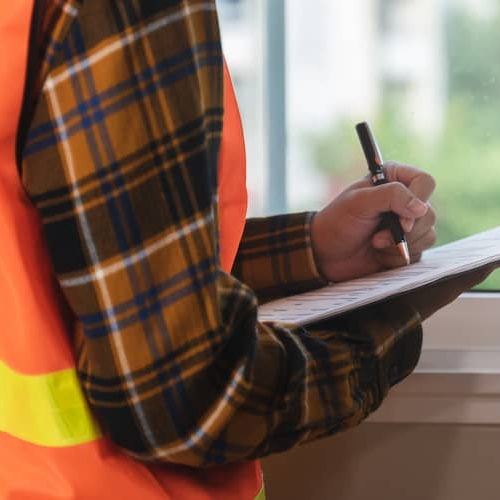
1. Carefully review the home inspection report
Take the time to thoroughly review the inspection report provided by the licensed home inspector. Part of what real estate agents do is help their clients analyze this report, so be sure to ask questions about any concerns you have.
Eric Fernwood, a real estate agent with Keller Williams in Las Vegas, says he’s seen too many buyers eager to move on without looking closely at important details in the inspection report.
“It’s vital to review the report carefully so you understand any significant issues and potential costs before moving forward with the purchase,” he says.
Look closely for any high-ticket red flags noted in the report, including:
- House with foundation issues like erosion
- HVAC system malfunctions
- Plumbing or electrical system issues
- Damaged flooring
- Roof damage
- Faulty appliances
- Pest-related damage
- Safety risks (like a faulty deadbolt or missing smoke detectors)
“While minor aesthetic details should be noted, serious flaws should be fixed right away. Depending on local contracts, buyers usually have five to 10 days from the time they receive the report to voice any concerns, negotiate repairs, or walk away under the inspection contingency,” Shirshikov says.
2. Decide which issues to prioritize
It’s a good idea to rank and prioritize any problems discovered and focus on those considered reasonable for the seller to address, such as structural issues, major system malfunctions, and safety concerns.
“I would prioritize issues like mold, foundation problems, electrical issues, plumbing breakdowns, and roof repairs. In these cases, the seller should handle the repairs because the true cost cannot be known up front,” Fernwood says. “For instance, we once had a house under contract where the inspection revealed multiple damaged roof tiles. The seller initially offered $500 instead of making the repairs. We declined, and they ultimately agreed to do the work, which ended up costing them more than $3,500 to replace the tiles and fix the roof.”
Cosmetic flaws, like dated kitchen cabinets or older carpeting, as well as other minor items, such as a sagging shed or unattractive landscaping, are typically not reasonable items for the seller to address. Many experts recommend that buyers fix small issues like these on their own.
“Every house has defects. Many of them are low-cost to have repaired or fixed DIY. If you notice a broken light switch or a non-operating fan, it’s not worth it to ask the seller to repair,” adds Fernwood.
Remember to review any mandatory repairs based on your state laws and mortgage loan program rules. There are FHA minimum property standards for those who have an FHA loan, for example. If you have questions, you can reach out to your real estate agent or lending professional for more information.
3. Get repair estimates
If you determine that repairs are needed and should be negotiated with the seller, it’s smart to get several quotes from several different vendors/contractors.
“This gives the seller assurance that repair requests are based on reality and avoids overestimating expenses, which can stall negotiations,” says Shirshikov.
Request detailed written estimates indicating the scope of repairs, including labor and material costs and timelines. Work with specialists if there are issues requiring expertise, such as foundation defects.
4. Send requests to the seller
Partner closely with your real estate agent to determine how best to proceed in sending any requests to the seller. These requests should be submitted in writing during the due diligence period outlined in your purchase contract. Your request options include:
- The seller completes and pays for repairs before closing. The advantages here are that the home will be move-in ready without any major fixes needed, and you aren’t on the hook for any of these costs. The downside is that the sellers may choose inexpensive methods for the needed fixes, you’ll have less control over the labor and materials used, and the repairs could postpone closing if they take longer than expected.
- Buyers can negotiate the house price for a reduction in place of repairs. With this option, you can move in without delay, unless you choose to fix the problems before taking occupancy. Also, paying less for the home will lower the amount you need to finance, saving you money in the long run. Unexpected expenses could surpass the home discount given if the repairs are larger than anticipated.
- Ask for concessions. Instead of requesting that the seller tackle repairs, request one or more concessions, like a credit toward your closing costs, a repair credit applied at closing, an escrow holdback for future fixes, or a prepaid service contract or home warranty. Concessions can lower your closing costs, freeing up dollars you’ll need for repairs later. The fixes will be your responsibility, concessions won’t decrease the home’s sale price, and certain loan programs could cap the amount sellers are allowed to contribute.
5. Await the seller’s response
After making a request to the seller, you can expect one of three responses. Here’s a breakdown:
The seller agrees
The ideal outcome is that the seller says yes by making the repairs, lowering the home’s price, or granting your requested concessions. If they agree to fixes, be sure to specify how any repairs would occur and when they must be carried out within the purchase timeline (before or after closing).
“Repairs usually take place prior to closing if the seller consents. To ensure the work is finished and up to the agreed-upon standards, you should arrange a final walk-through,” says Shirshikov.
Additionally, request receipts for any work done and have your agent confirm the repairs were completed by professionals.
The seller declines
The worst-case scenario is that the seller declines your request. This can be evident if your request is ignored entirely, without any response, or if the seller sends a written response.
“If the seller says no, you can choose to walk away under the inspection contingency in your contract and recoup your earnest money, renegotiate with the seller, or accept the house as is. Long-term affordability should be weighed against the expense and effects of unresolved issues, however,” Shirshikov says.
Have your agent remind the seller’s agent that they share responsibility for disclosures and repair issues. Your agent can also remind the seller’s agent that the buyer can back out of an accepted offer, depending on the contingencies.
“By putting pressure on the listing agent, you may have fewer problems in getting larger items corrected,” says Fernwood.
The seller makes a counteroffer
Alternatively, the seller could make you a counteroffer. For instance, they could offer to split the repair costs 50-50 with you, resolve only certain property issues (but not all of them), or offer seller concessions, like closing cost credits, an escrow holdback, or a lower home price.
“This is very common. A seller may agree to some repairs but decline others. Sometimes they will handle a few items and offer a credit toward closing costs,” says Fernwood.
Otranto says you can likely expect at least two rounds of offer and counteroffer.
You can prepare for a counteroffer by considering your budget, timeline, and the contingencies that are important to you, among other things. You may also want to consult your real estate agent and lending professional.
“The purchase of a home is a complex transaction and is subject to negotiation, so be patient. Evaluate whether their counteroffer is a fair deal. If the seller offers a reasonable concession, it could be better than starting over. Focus on net value, not just initial emotion,” he says.
You don’t have to accept the seller’s counteroffer. Instead, you could decline or negotiate further. Consult closely with your real estate agent and, if necessary, a real estate attorney.
6. Update the home purchase agreement
If you choose to proceed with the sale, you’ll need to have your home purchase agreement/contract updated to reflect any repairs or other items negotiated with the seller.
“Any agreed-upon repairs, price adjustments, credits, or negotiated terms must be documented in an addendum to the purchase agreement. This protects both parties and ensures accountability,” says Otranto.
Remember to review your updated agreement carefully and ask questions about anything you don’t understand before signing.
7. Proceed to the final steps to close
Once you’ve reached this point, you’re almost done, and closing is just around the corner. Here’s what you’ll still need to do:
- Ensure the seller completes any repairs as agreed. This must be done before closing, and reinspection and receipts may be needed to validate that the work was properly finished.
- Complete a home appraisal. If you are financing the home, your lender will require and order an appraisal following acceptance of your offer. This confirms that the property’s value aligns with the loan amount; this step must be finished before final loan approval is given.
- Finalize the mortgage application and title search. Your lender must complete the underwriting process, and your title company must verify clear ownership. Both matters must be handled before closing.
- Perform a final walk-through of the property. This is commonly completed within 24 hours of closing; the walk-through lets you verify the property’s condition and check that any needed repairs were done.
- Attend the closing meeting. Prior to scheduling the closing meeting, you will be told you’re clear to close, which means you’ve met all the requirements to close on your loan. At the closing meeting, be prepared to sign title documents and final loan paperwork at closing, as well as pay closing expenses and formally transfer ownership of the property.
- Take occupancy of the home. After the closing is finished and the deed is recorded, you’ll be given keys to the home and can move in per the terms of your purchase contract.
FAQ
What affects whether a seller agrees to repairs?
Different factors, like whether it’s a buyer's market or seller's market, the type and severity of repairs needed, offer terms, and the seller’s motivations, can impact whether the seller agrees to cover repairs. If the property has been sitting for a while or the seller plans to relocate quickly, they may be more flexible and willing to make concessions or price reductions. The way you present your request can also be important.
Can my home inspection help me plan for maintenance?
Information in the home inspection report is valuable, even if you don’t request repairs for certain issues. That’s because items indicated in the report will help you know what may require renovation or remodeling in the years ahead. For example, the report may flag a rusty water heater that may need to be replaced soon or a wobbly ceiling fan in need of maintenance or repair.
Can a seller back out after the inspection?
There are some situations in which a seller can legally back out of a purchase contract. The findings of a home inspection report cannot be used for this purpose. In some cases, a seller may also include a “kick-out clause", which allows them to continue marketing the home and accept a stronger offer under specified conditions.
When should I walk away after the inspection?
It can be wise to walk away from the deal in certain circumstances, such as if the professional home inspection report reveals red flags, particularly issues related to safety and health, or if the seller isn’t willing to address your repair requests. Walking away from a home sale after signing a contract can result in possibly losing your earnest money deposit, forfeiting inspection or appraisal fees, and even facing legal action such as a breach-of-contract lawsuit if you back out without having contingencies that are clearly stated in your purchase contract. Writing a letter to the seller, under the guidance of your real estate agent, could help matters.
Can I get another home inspection after the repairs?
You, the buyer, can opt to have the home professionally inspected again after the seller makes the requested repairs. The inspector can check that the fixes were properly completed and that the property meets code or safety standards. The findings of your second inspection can help you make a more informed decision on whether to request further repairs or credits, negotiate the home’s price, proceed to closing, or abandon the deal (if allowed by your contract).
The bottom line: Don’t neglect post-inspection steps
Following completion of a professional home inspection, it’s a good idea to carefully review the inspection report with your real estate agent. If any issues are indicated, determine whether to request repairs, negotiate a lower price, or ask for seller concessions or credits. Be prepared to gather repair estimates, submit your requests to the seller, and await their response, which could be a counteroffer, agreement, or refusal.
When you are ready to apply for a home loan, you can find out what you qualify for from Rocket Mortgage®.

Erik J Martin
Erik J. Martin is a Chicagoland-based freelance writer whose articles have been published by US News & World Report, Bankrate, Forbes Advisor, The Motley Fool, AARP The Magazine, USAA, Chicago Tribune, Reader's Digest, and other publications. He writes regularly about personal finance, loans, insurance, home improvement, technology, health care, and entertainment for a variety of clients. His career as a professional writer, editor and blogger spans over 32 years, during which time he's crafted thousands of stories. Erik also hosts a podcast (Cineversary.com) and publishes several blogs, including martinspiration.com and cineversegroup.com.
Related Resources

13-minute read
Requesting repairs after a home inspection: What to request (and what’s reasonable)
Learn how to handle home inspection repairs and request repairs after a home inspection. See what’s reasonable to ask for, negotiation options, and tips.
Read more

7-minute read
A buyer's home inspection checklist
Inspections verify the safety and integrity of a buyer’s future home. Here’s a buyer’s home inspection checklist with all the key informati...
Read more
6-minute read
What does a home inspector do?
A home inspector’s job is to review a property’s systems and structures to ensure they are safe and working correctly. Learn what a home inspector l...
Read more